The Payson butt joint. I had heard about it, but never done it until now. Two little strips of fiberglass holding a butt joint of plywood together. Hardly seems it should be as strong as it is reported to be, but things are not always as they seem.
In this way, we have been joining three sheets of plywood end to end, to make each of the two sides of the hull. The technique of laying out wetted fiberglass on the floor, then pushing the plywood down into it is totally counter intuitive and I was a little bit unsure of myself, but it seems to work out well enough.
Here you see me wetting out three strips of fiberglass, two, four, and six inches wide, I drew a line down the center of my plastic and centered my glass strips on that line, hoping to use that to align the whole unit properly when I am operating blind under the plywood.
I decided to screw the plywood together temporarily with blocks (on the back side in this picture) so that I wouldn't have to fool with the relationship of the plywood sheets to each other, just that of the wetted glass to the plywood. I stood them up like you see here, then buttered the edges with slightly thickened epoxy. Next, I set some of that thin foam that you use for padding under a laminate floor to sort of cushion the wetted glass and maybe provide a more even pressure than being mashed down into the flat, hard concrete. Then I positioned the glass between sticks and flipped the plywood down on it. This allowed me to fiddle with the alignment of the glass before finally slipping the sticks out and bringing on the weight.
Luckily, I had this fine person to lift up with a crow bar while I slipped the sticks out from under the plywood. She is only in kindergarten, but she is a crack shop hand already!
After the weight is holding everything down, I unscrewed the blocks and applied the top layers of glass like normal.
We had a cold snap while we were doing the second side. I heated some bricks on the stove.
 |
| Hey, it's freezing...let's get out our shorts and bathing suits!!! |
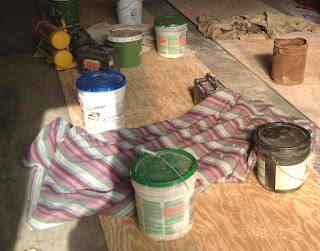
Then I set them on the joints on cardboard insulators. The glass was not wet here. Just, slightly tacky (like me).
Finally, I blanketed the whole thing and hoped for the best.
None of this may have been necessary, I don't know. I was using the fast epoxy, so I don't know if I saved myself a day here or not.


I haven't done those joints myself, but from what I've read, and from what I see here, it looks pretty good. Great idea with the heated bricks and blanket!
ReplyDeleteThanks, Alan. I once lived in a basement apartment where I was too cheap to spend money on heat, so I set a brick on the electric stove for a few minutes, wrapped it in a towel, and took it to bed with me. Then I met a nice girl and I didn't need the bricks anymore.
DeleteSounds like you've got it down, so any comments are toward fine tuning...
ReplyDeleteOne method that's worked well for us is to clamp the joint between wide 2x planks:
Panels are blocked up in place on 2x stock.
Lower is overlayed with waxed paper or plastic, and glass/resin layed on top.
Position under butt and fasten sheets onto plank each side of the joint.
Apply upper layer of glass/resin and cover with
wax paper or plastic. Smooth with spatula.
Clamp upper plank straddling butt.
This is all overkill compared to Payson's method, but is one pass instead of two (as your method). The clamping ensures an inline, smooth join.
Love that crew!
Here's a thought RE trike ramp... finished hull upside down with approach ramps at ends and safety rails along sides? skateboards'll be coming soon enough, anyway! 8)
Dave Z
Dave,
DeleteI'll keep your advice in mind for the roof panels. Maybe that ramp thing will make a nice retirement job for the boat.
Come to think of it, just put it right side up, block up the ends, tear out all the transverse frames and it is a proper skateboard ramp.